
A Whistler wedding asks more of your hair than a downtown one. There's the drive up the Sea-to-Sky, weather that can swing from sunshine to sleet in an afternoon, photos on a windy mountaintop or a lakeside dock, and a long night of dancing in dry, heated air. Your hair trial is where you find out whether your chosen style can handle all of that, while there's still time to change it.
Use this checklist to get the most out of your trial.
1. Book the trial at the right time
- Four to eight weeks before the wedding is the sweet spot: close enough that your hair length and colour will be nearly the same on the day, and far enough ahead to schedule a second trial if you need one.
- After you've chosen your dress and veil. The neckline, the back of the dress and the weight of the veil all shape which styles will work.
- On a day you can wear it for hours, such as a dress fitting, an engagement shoot or a dinner out. You'll learn far more from how it looks at hour six than at minute five.
2. What to bring
- Photos of your dress, especially the neckline and the back.
- Your veil, headpiece, hair comb or flowers, or close stand-ins.
- The earrings you plan to wear, since they change how much hair you'll want around your face.
- Three to five inspiration photos, plus one or two of looks you know you don't want. Those are often the most useful of all.
- Clip-ins or extensions, if you plan to wear them on the day.
- A top with a similar neckline to your dress, or a plain white top.
If you can, schedule your makeup trial for the same day, or at least arrive wearing makeup close to your wedding look. Hair judged against a bare face almost always looks wrong.
3. How to arrive
Come in with clean, dry hair and no heavy oils or serums. Ask your stylist beforehand whether you should wash the night before or that morning. Many updos hold better on hair that's a day past its wash, while some fine hair types need it fresh. Whatever they recommend for the trial, plan to repeat it exactly on the wedding day.
4. Test it for mountain weather
This is where a Whistler wedding differs, and it's worth asking your stylist to style specifically for these conditions.
Wind
Gondola decks, lakeside docks and open meadows all catch the wind. Soft face-framing tendrils look lovely but whip across your face in a breeze. At the trial, step outside or stand in front of a fan and see what moves. Veils need a secure anchor; a comb set into a bun or under a braid holds far better than one slid into loose waves.
Rain and damp air
Curls drop in humidity. If your heart is set on loose waves, ask for them to be set with hold and pinned to cool before they're released, and notice how much they've relaxed by the end of the day. If they've fallen flat by evening in the city, they won't survive a misty afternoon in the mountains.
Cold
For a fall or winter wedding, think about what you'll wear between photos: a faux-fur wrap, a cape with a hood, a toque for the snowy shots. High, voluminous updos and hoods don't mix, so a low bun or a braided style is often the more practical choice.
Dry indoor air
Heated lodges and long evenings create static. Bring a small anti-static product or a dryer sheet in the touch-up kit, and ask your stylist which finishing product they'd use to keep flyaways down.
5. Consider braids
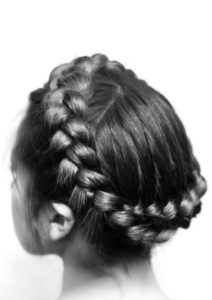
Braided styles are among the most weather-proof options for a mountain wedding. A braided crown or halo keeps hair secure through wind, hugs and dancing, and works well under a veil. Braids also pair nicely with loose waves at the back if you want softness. Have a look at the Royal Crown and Fishtail Halo on our Braid Bar page for inspiration. Simpler braids are also a quick, reliable option for bridesmaids, and they hold their shape through a long evening far better than loose curls.
6. Questions to settle at the trial
- How long does each style take? Allow more time than you think. A bridal updo can easily take over an hour, and you'll want buffer time before photos.
- Who's getting their hair done, and in what order? The bride usually goes near the end, but not dead last, so there's time for adjustments.
- Where are you getting ready? If you're styled in Vancouver and then drive up, a two-hour car ride leaning against a headrest will flatten anything high or full at the back. Plan the style around that, or around getting ready in Whistler.
- What goes in the touch-up kit? Bobby pins matched to your hair colour, a travel-size hairspray, a small comb, clear elastics and a couple of spare pins for the veil.
7. Document everything
Take photos from the front, both sides and the back, in daylight and with flash. Ask your stylist to note the products, the curling iron size and the pin placement. Then wear the style for the rest of the day and pay attention: what slipped, what felt heavy, and did any pins give you a headache? Honest feedback is the point of a trial, so share it.
8. Plan your countdown
- Two to three months out: start any big colour change, and book microblading if you're considering it.
- Four to eight weeks out: hair trial.
- Two to three weeks out: a light trim to tidy the ends.
- One to two weeks out: colour refresh and toner, and brow shaping and tinting. Our balayage aftercare guide explains how to keep that fresh colour bright, and our brow lamination vs microblading guide covers brow timing.
- The week of: deep conditioning, no new products, and plenty of sleep.
When you book your trial, mention the venue, the season and the dress, and your stylist can plan the right style before you even sit down. Updo and braid pricing is on our services menu.